|
| |
It's finally time to get back to making sawdust again after a much too long break.
| Date |
Description |
| 17-Mar-2007 |
Attach the bottom portion of the aft tabernacle to the mast stub.
Rather than following the plans and using regular door hinges, I am using gate hinge parts
for added strength and to allow for the mast to go down more than 90 degrees. |
| 12-May-2007 - 21-May-2007 |
Took a week off to do stuff around the house and boat.
 | Built and attached the roof rafters for the cabin |
| Frame in the stringers around the cabin trunk |
| Attach the hatch stops |
| Cut out the portlights and install the inner rings |
| Seal with resin and paint the cabin trunk |
| Mount the forward bulkhead hatches including the electrical panel. |
      
The electrical panel is mounted in the port side bulkhead cutout. I attached a piece
of plexiglass to the back of the panel and ran the wires from the panel to brass bolts on
this plexiglass. The intention is to mount the wiring for the rest of the boat to
here. Initially, I plan to just use a small portable battery to power the lights
etc. I have also though purchased an automotive relay from Sayel Electronics who were quite helpful and made sure I
had everything I needed. This relay will allow me to use a switch on this control
panel as the master switch to turn on power to the eventual electric motor I want to
install.
|
| 6-Jun-2007 |
With the aid of my son (and the dog), mark, cut out, and install the
cabin roof. I found it easiest to put the dog and boy in the cabin, put the
companionway hatch in place and then lay a full piece of plywood on top of the rafters.
My son marked the inside, and I marked the outside. I cut the pieces a bit
large. I also used the actual location of the companionway to mark out the hatch
location in the roof. It was off from the plans by about 1/2"
 |
 |
| Roof In Place And Screwed Down |
As per the plans, small pieces were necessary to fill in at the sides |
 |
 |
| Some addtional trimming will be required at the companionway |
A use for all those lead weights I cast last year |
 |
 |
| Some clean-up will be necessary on the inside before painting |
For the filler pieces and at the front of the cabin, gaps exist that need
to be filled with glue |
 |
| Fits just right |
|
| 9-Jun-2007 - 23-Jun-2007 |
Fill in screw holes with body filler, fiberglass the roof of the cabin,
paint the inside of the cabin roof. My polyester resin has crystalized a bit over
the last year and that has caused some issues that I need to be careful with. I'm
down to a bit less than 1 gallon left - hopefully it's enough for the bottom and the
sides.
READY FOR TURN-OVER! |
| 30-Jun-2007 - 2-Jul-2007 |
Flip the boat over on Saturday and then try to relax with a very sore
back. Also trim the sides with my router and a round-over bit and do some filling of
screw holes etc with body filler. On Sunday fiberglass the port side of the
bottom. There was exactly enough fiberglass resin left for that one side.
Sadly, much of the resin had crystalized, and some, which I had poured from the pail into
the tin can of older resin mysteriously turned into jelly-like blobs.
 |
 |
| It's over and suspended by bow and stern eye |
First modification to dolly (missing the buckets and
padding at the front. |
 |
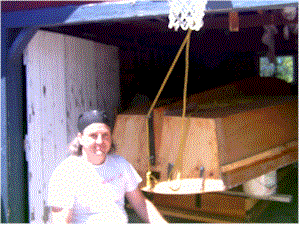 |
| Good thing the bow eye is so solid |
Happy that it's over and having a sore back |
 |
 |
| Handy buckets of the right size to hold up the stern |
Pool noodle and old rags to pad at the front of the cabin |
 |
 |
| Good thing that it fits. |
Trimming of the sides to be done |
|
| 7-Jul-2007 - 25-Jul-2007 |
Trim using my router, fill screw holes, fair (fairly badly), fiberglass,
fair, and 2 coats of Tremclad Recreation White. I used the heavier fiberglass for the
bottom and sides as planned and it went pretty well. I ran the fiberglass up the
side of the keel about 2 cm and down to rub rail. I trimmed the fiberglass to there
as I went, and also sliced the fiberglass vertically to eliminate folds on the sides.
Rather than cutting darts, I just let the one side overlap the other. That
part went not too bad. Unfortunately during the fiberglassing of the port side, I
ran out of my original supply of resin. I purchased another gallon from PartSource
which got me through the starboard side as well as some extra filling on the port side.
I also picked up a gallon size of Bondo brand body filler to use for fairing as I
found that you can go through filler pretty quickly. I also finished off my first
gallon of paint and picked up a second one to do the second coat on the bottom.
In the end, there are lots of drips, sags, lumps and bumps, mainly because I didn't
want to spend the next 6 months sanding, and in part due to the fact that my little palm
sander didn't make much of a dint in the project. This coming weekend will hopefully
be turn-over time again.
During this time, I also worked a bit on my mast but have nothing exciting to report.
The tabernacle parts are almost all installed though.
  
|
|


